On a daily basis Clothing Manufacturing Agent Bali receives numerous inquires from clients with a variety of questions. The most widely asked is regarding the process of clothing manufacturing; not knowing where to begin or what steps to take next.
Here we will outline it the 8 step to clothing manufacturing from beginning to end. After reading this, you will have a understanding of what to expect during the clothing manufacturing process.
Step 1: The Right Mindset
Before we outline the steps of the clothing manufacturing process, having the right mindset is crucial and needs to be the first step addressed. There are certain aspects which will allow the process to run more smoothly and seamlessly if you are aware of them.
Learning to be more flexible – things are constantly changing and do not go at a fast pace; but making quality products should take time – anything good in life does. It is a process and there must be back and forth open communication – it does not happen overnight, it takes time – be prepared to devote time to making it work.
Understanding the timing of the clothing manufacturing processes – We provide a general guideline for a production of 3 months; after the completion of the patterns and samples which in itself can take 2 weeks to 2 months, but this is not set in stone. If we are able to finish the production sooner; we will, but sometimes it can take longer depending on a number of factors. There are many moving parts that all need to be lined up to make everything flow which vary based on your production but include sourcing fabric, making screens, digital strike offs, printing, batik, sublimation, leather work, hardware, woven tags, swing tags, mass production, shipping, QC, etc. The first productions will take slightly longer in most cases than the latter.
Quality products come at a cost; the bottom line is important to everyone involved – at both ends. Work with your manufacturer to negotiate low production costs. Keeping these low will allow your brand to expand and grow faster by manufacturing more. Additionally, knowing that you will be manufacturing in ethical ways by providing ethical living wages for families and communities where you produce should be a major factor. The cost associated with doing business to produce quality products should not be sacrificed. Many places cannot and will not compete with pricing of places like China, India or Vietnam so be realistic of what you are going to pay for quality and ethical manufacturing.
Producing samples and a mass production are time consuming; it will require attention. If you are not able to provide it the attention it deserves and requires, than working with an agent or consultant is best.
Step 2: Spec Sheets and Quotes
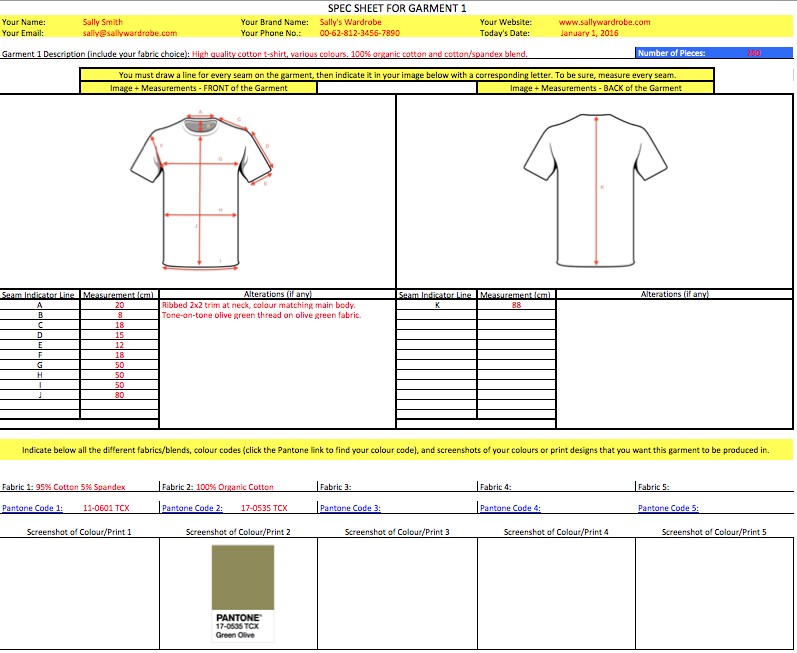
The first item the manufacturer will need from you will be to provide them with are spec sheets. Spec sheets are the full design details including measurements, fabrics, printing techniques, and supporting images for the garments you want produced. It is best to provide the most amount of detail and information possible. Below is an simple example of the spec sheets we use. Click here to download your own copy to get you started.
Tech packs are the all encompassing designs including full detailed measurements, lining details, button and zipper customisation if required, woven labels, swing tags, packaging, etc. A great site to create this is Tech Packer. Here you will be able to create your own tech packs as well as share it directly with the manufacturer and suppliers. It is free to register and has already received support from Sylvia Lam from Billabong and William Mera from Victoria Secret Pink. Its a great tool to get you started – check it out!
Based on your spec sheets, manufacturers should be able to provide you with production cost quotes. However, it is sometimes difficult to gauge the true fabric usage and time to produce 1 piece. For example: when making board shorts; you might be making very similar pairs in the same fabrics but depending on the fabrics usages, complexity of design, amount of pattern pieces and cuts needed, this will impact your cost. Some manufacturers may produce the sample first and then bill you for payment. The drawback to this is the possibility of being surprised with a cost you were not expecting but already obligated to pay.
Once you get the quotes from the manufacturer, you will want to negotiate with them to see if you are able to bring the costs down. When you are happy with the production cost, only then should you proceed into the clothing manufacturing process. Be prepared with a realistic budget in place!
Step 3: Sourcing all Materials, Fabrics, and Accessories
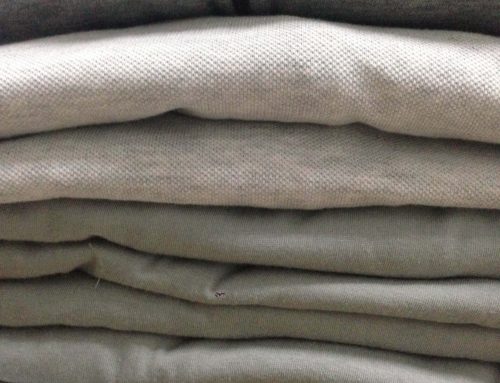
Sourcing materials and fabrics can be a daunting process. There are so many different types of fabrics to choose from; where do you begin. The best start is to have an idea of some material and fabrics you might want to work with before you go into the suppliers. Once you are there, they would be able to give you some guidance as to what might be the best fabrics based on the designs and direction you are going for. If you go in without direction, you will be lost in a sea of linen and lace and viscose and rayon and cotton and modal and nylon and it keeps going!
Some widely used fabric will come in a variety of pre-dyed colours. If the fabric does not come in the colour you want; which quite often happens, it will need to be dyed to the colour you choose based on the pantone codes you provide. This has an MOQ of approximately 50 to 100m.
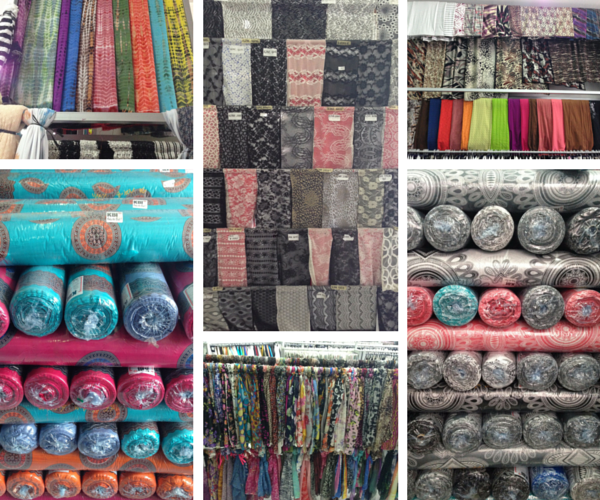
If you are looking for printed fabrics, sometime the design you like will be available but not in the material you want. In this case, the supplier should be able to help you in providing printing services in house or know of a company that can screen or digitally print fabric out house. Keep in mind, when printing fabrics (or dying them) there are MOQs for this; be prepared to produce at least 50m+ in most cases. (50m of printed fabric will produce about 45-50 t-shirts).
Alternatively, rather than buying fabrics that might not be exactly what you need nor be the print you want, manufacturing the textile right from the factories might be the option for you. Indonesia is one of the worlds largest textile producers and as such is a great source to make not only your own prints but your own fabric weaves as well. There are a number of textile producers in West Java as well as Jakarta – keep in mind again, the MOQ for this would be about 3000kgs (depending on the gsm – grams per square metre – of the fabric this might equate to abut 3500m)
 If your garments require accessories such as zippers, fasteners, or buttons, the manufacturer should b able to help you with this. However, a good place to start is at YKK – they are the worlds leader in zippers, snaps, buttons and hooks. You can download the catalogue of all their product from their website.
If additional hard ware is required; like the Michael Kors name plate or customised buckle, this might be more difficult to source. These types of items are sometimes made by jewellers as wax moulds or die cuts need to be made. Again, however, ask your manufacturer as they may be able to point you in the right direction to connect you to the right people.
Step 4: Patterns, Sampling and Size Grading
After you have confirmed your production cost quotes and sourced everything necessary for your garments to be produced, you are now ready to have your patterns and samples made. The cost of this process is normally the production cost x 2 or 3 – this will vary between manufacturer. Some may charge you separately for the patterns and the samples so make sure to speak to them to ensure you are getting what you expect.
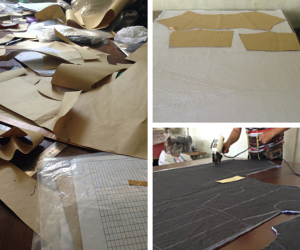
What the patterns entail is taking all of the information provided in the spec sheets (or physical samples provided) and making paper based outlines or designs which will be use as a template, laid onto the fabric, traced and cut out. Here you can see patterns, on the fabric and being cut.
From these cut outs, the fabric will then be sew together to make your samples. The initial sample will be a “sew sample” – it will not have the full details such as the specific colour you want (will be made in RFD – Ready For Dying), printing techniques, woven tags, etc. It is to get the right fit, fabric and to see the quality of sewing before proceeding into full production. The initial sampling phase will usually take anywhere from 1 to 4 weeks depending on the complexity of design.
When speaking to your manufacturer; along with spec sheets you had provided them, it is best to give them a sizing guide you are comfortable using – there are so many different options with UK, US, European, Australian sizing, etc. – you don’t want to get this aspect wrong! This sizing guide will be used to grade all of your patterns which will allow them to make all the different sizes required. Confirm with your manufacturer as well if there is an additional cost for size grading.
Step 5: Review of Samples
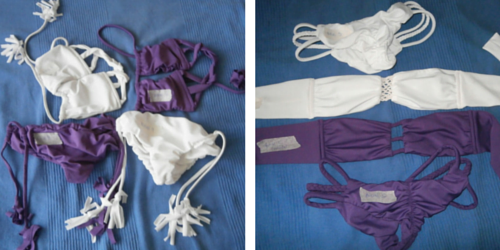
Once the samples are completed, they should be shipped out to you so that you can review them. What you will be looking for is the feel and fit of the fabric – does it sit right and feel nice on the skin – does it flow and fit properly. If not, you might need to change the fabric choice and proceed to make samples again – keep in mind, you will be charged for this.
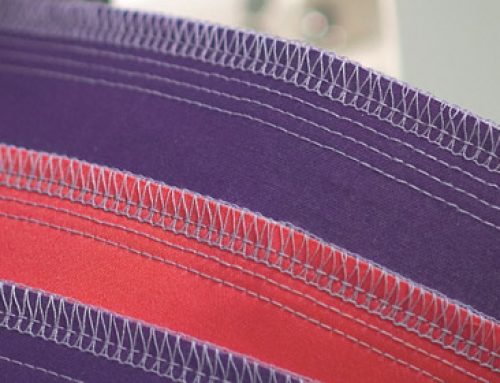
Ensure to check all of the seams in the garments – give them a good tug to ensure their strength. Wash them according to the clothing care instructions to ensure they withstand the wash and dry cycle – do this 3-4 times to be sure.
If there are any changes required, communicate this very clearly with your manufacturer so that you do not have to make multiple adjustments and corrections. Sometimes the best and easiest way of doing this is with masking tape with instructions taped onto the garment in the area that needs correcting. Also, taking pictures of the pieces and editing the images by adding text and circling ares that need correcting is always helpful. If you do need to make adjustments, they should be free for the first correction. 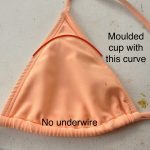 Anymore than this and you may be charged fees again. Also, if you decide that the garments needs to be wider or longer; this will require new patterns to be made, you will be charged the sampling costs again – it is easy to reduce the fabric but it is not possible to just add a little. Think of it like cutting your hair, once its cut, you cannot just add it back.
Samples are a back and forth process so be prepared for the possibility of corrections. Give the manufacturers time to correct any possible changes necessary. Take the time to get your samples right.
Step 6: Preparation for Mass Manufacturing
At this stage, you now have perfect samples or “master sample” which will be used as a basis for all other garments to be made off of. You are now ready to proceed into the preparation for mass manufacturing.
This process includes a variety of items; some of which may apply to you and others may not – it differs depending on your production. As well the timeframes below may be slightly different depending on where you are manufacturing – this is based on Bali and Indonesia.
Some of the preparation items include:
- Ordering all the fabrics and materials – This will take approximately 3-4 days from placing the order with the suppliers to delivery. If the fabrics or materials are not available at that time, it could take up to 2 months to receive it if it needs to be ordered from the textile producers.
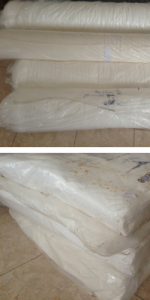
- Hot Wash or Preshrinking – This is the process of washing all the fabric in hot water to preshrink it before the garment are cut and sewn. It is strongly suggested to do this as it will ensure the proper fit of the garment even after your customer has washed it themselves after wearing. Depending on the fabric, the shrinkage can be anywhere from 5-15% – usually 8-12% is the norm. It will take approximately 1-2 weeks, depending on the amount of fabric being processed.
- Dip Dying – This is the process in which RFD fabric (Ready For Dying) is dipped into dye that has been mixed to match your pantone code. This will take approximately 1-2 week to process a solid colour.
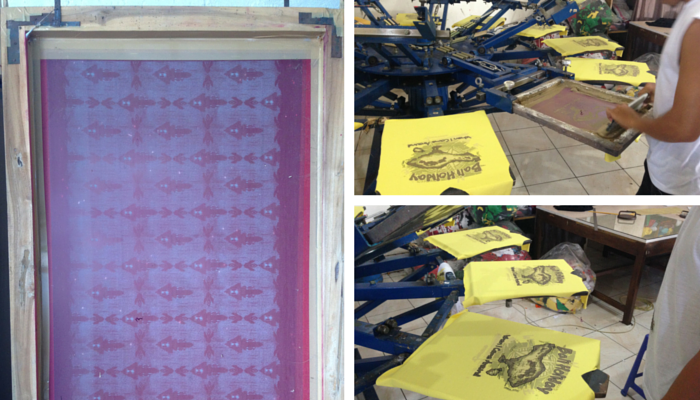
- Screen Printing – This is the process by which a mesh-based stencil is placed onto fabric and a squeegee is used to move ink overtop of it. There are certain parts of the stencil that are blocked out and do not allow the ink to pass through. The area where the ink does pass through deposit the colour onto the fabric. This process takes about 2 weeks to make the screens and another 3-4 weeks to print and process the fabrics.
- Digital Printing – This printing technique is produced by computers from files. It will take 2-3 weeks to do a strike off or a test print and another 2-3 weeks to print and process the fabrics. The manufacturer should be able to accept files in AI, PDF, JPEG or PNG set to scale in repeat or yardage printing.
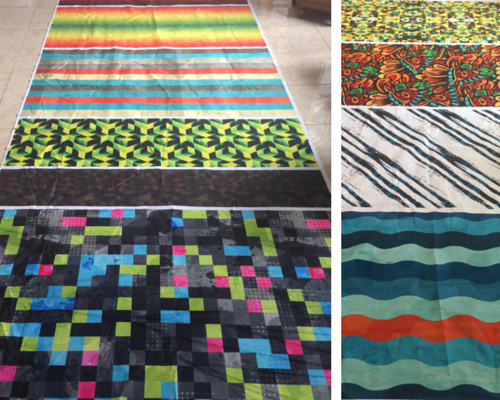
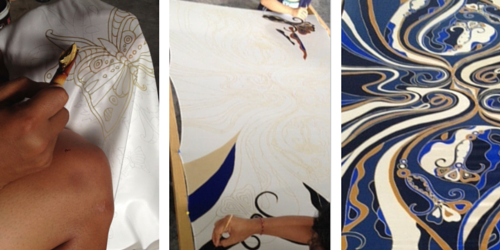
- Batik Printing – This is a hand painting technique in which wax in added to a canting pen which is then draw onto the fabric. The fabric is then hand painted in a variety of colours and the wax is washed off leaving the design. This is a very labour intensive method but the results are amazing! To produce 1m of batik fabric; some designs can take up to 3 hours to draw, another 5-6 hour for canting and 1 day to paint.
- Accessories or Hardware – Accessories can be items such as buttons, zippers, snaps, eyelets, press stud, etc. Hardware are items such as buckles or plate (similar to the Michael Kors image above). Both of these items can take up to 4 weeks if special order or customisation is required.
- Woven Brand Labels – This is your brand tag that is sewn into the garments on the inside at the neck. Files are usually required in AI, PDF, JPEG or PNG in high resolution and set to scale. This will take approximately 2 weeks. The MOQ is 3000 pieces. These can be made while the production has started.
- Swing Tags – This is the tag that will be attached to the garment on the outside. Files are usually required in AI, PDF, JPEG or PNG in high resolution and set to scale. This will take approximately 2 weeks. The MOQ is 1000 pieces. These can be made while the production has started.
- Clothing Care/Sizing Labels – This is the tag that will be attached to the garment on the lower inside seam. Files are usually required in AI, PDF, JPEG or PNG in high resolution and set to scale. This will take approximately 2 weeks. The MOQ is 3000 pieces. These can be made while the production has just started. Keep in mind that you will require different clothing care label for each different garment with each different fabric.
Step 7: Mass Manufacturing and Quality Control
Once all of “Step 6” is in place and ready, the mass manufacturing and production can begin; the CMT (cutting measuring trimming). The general timeframe for a production is 3 months; this will vary based on the total amount of pieces in your production, the complexity of designs as well as what other productions are in the schedule at that same time. The preparation for mass manufacturing would be included in this 3 month timeframe.
During the mass manufacturing process, quality control is the utmost importance. You should ensure that the manufacturer you work with is able to offer the services of doing QC on a bi-weekly or monthly basis. This should be preformed by randomly checking approximately 15-20% of all completed pieces up until that point. This will allow any errors to be caught and corrected in a timely manner and not impact the completion date.
After receiving your production, you should be given time to review the pieces for QC. If you do find any rejects, send it back to the manufacturer so that they can repair or replacement it for you.
Step 8: Shipping
The majority of manufacturers will have business accounts with shipping (by air) companies in their area. Some of these include DHL, FedEx and UPS. Having the business accounts will allow them to negotiate better prices than what is quoted online. Shipments will arrive in approximately 4-10 days depending on the delivery location and method.
Alternatively, if you are manufacturing large quantities that would require shipping by sea; a 20 or 40′ container, there are a number of freight forwarders you can contact and find online. This delivery method will take 2-3 months and usually has a minimum of 3cbm.
Once everything is packed, and before delivery, the shipping companies will require a performa invoice. This is the form that customs need in order to ensure the products are allowed into the country but also to identify all the contents.
When shipping; either by air or sea, there will be duties, taxes and insurances required.
Duties and taxes are paid by the receiver in their country. The duty and tax amount will vary depending on the value of goods and country of delivery. This duty calculator may help you in establishing what your approximate costs might be so you can add this into your budget.
Insurance is automatically included when using DHL, FedEx or UPS and additional can be purchased at an extra charge but when using a shipping by sea company and freight forwarders, there are no insurances include so you will need to purchase this in all shipments. Whichever option of delivery you choose, you may be able to declare a lesser value of the goods. This is great as your taxes and duties will be a lesser amount once the delivery arrives, however, if it does not arrive, the insurance will only cover you for the value you have declared which in this case, you will not get full reimbursement. This is a decision left up to you.
There are many different variables and moving parts in the clothing manufacturing process. We hope that by writing this post, “8 Steps to Clothing Manufacturing” it will become a useful tool for everyone who is inspired to create. We would love it if you shared this post with your network.