In this page, we’re going to walk you through a step-by-step process of How to Fill in Tech Packs.
IMPORTANT: Read Through This Entire Page!
One of the most crucial steps to getting your clothing manufactured correctly is to provide manufacturers with detailed blueprints to each style in your collection; these are known as tech packs. Without this information, our network of manufacturers and suppliers can’t assess how much fabric your production will consume, how much materials your production will need, what dyeing will be required or what printing techniques would best suit your designs, or know how long it will take to produce just one garment.
Everything will impact your production costs so its essential to provide as much detail as possible at the beginning of your enquiry in order to receive a more realistic production cost – nobody likes surprises!
To download ours, simply click – tech packs – to automagically download them now.
How to Fill in Tech Packs: The Tech Pack
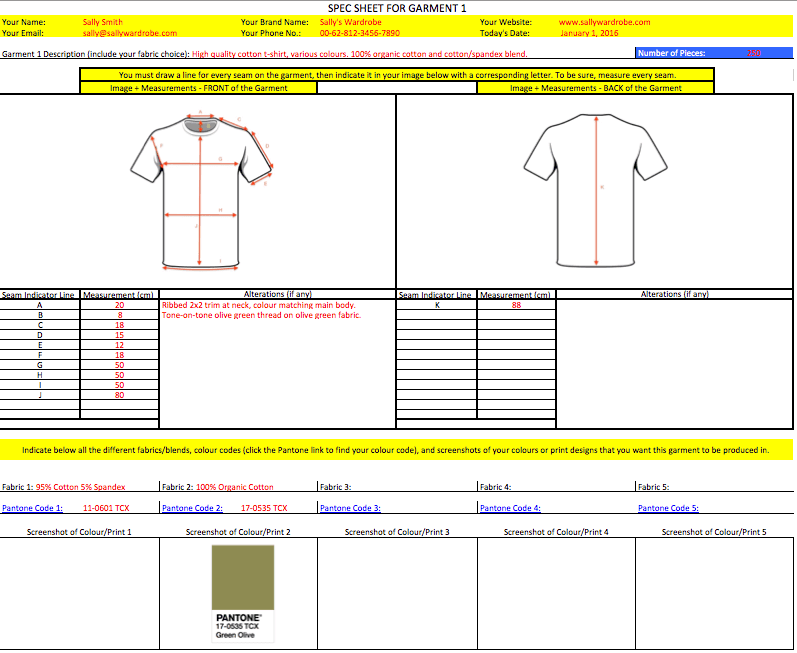
To get things started, lets have a look at our tech packs. Below is an image of our tech pack with all of the information that CMAB, the manufacturers, and our suppliers require. Notice all the tabs along the bottom?
The Sample will guide you. The Master is a collection of only single images per garment, sort of like a gallery of images. And each other spec sheet along the bottom is meant to have all construction information for one garment only.
If any of the items are left blank, we may not be able to provide accurate or realistic production quotes for you. To be on the safe side, MEASURE EVERY SEAM!
All the Sections
- Client Name, Brand Name, Email and Phone Number: We receive a lot of enquiries everyday as do our manufacturers and suppliers. If you do not fill in your correct contact details, we may not be able to contact you back to provide your quotes. Ensure that all of these fields are filled in correctly.
- Date: This is the date in which you are submitting the spec sheets to CMAB. This will allow us to track a proper timeline for your project.
- Garment Description: What are you making? This is a 1 to 3 word description such as skirt, 3/4 pants, short sleeved t-shirt, etc. Perhaps you’ve given each of your garments a style number such as “FALL16 – pants 001” that you would like us to reference? You’ll need to indicate it here.
- Number of Pieces: This would be the quantity of pieces for this specific garment style that you would like to produce. Filling this in is important because it will allow us to correctly choose amongst our specialist manufacturers who may have an MOQ that’s close to your desired production volume. However, keep in mind that the MOQs are based on the design, fabrics, dying, printing, etc.; but well get to that later.
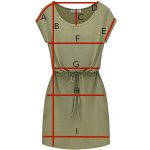
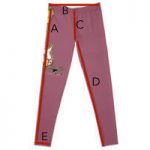
- Garment Front & Back Images: Simply put, this is an image of your garment as seen in a straight front and straight back view. These can be drawings or a photos. Just like in our example, you’ll need to add indicator lines with corresponding letters that highlight specific seam-to-seam measurements. These measurements would need to be filled into the “Specifications” section in the spec sheets.
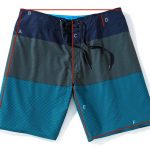
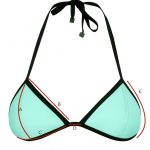
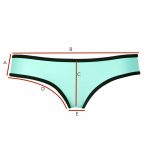
- Seam Indicator Lines: Our manufacturers need to clearly see all the seam-to-seam measurements to understand fabric consumption, garment cut and style, and sizes. All measurements should be typed in centimeters. Use the image above as your guide to ensure you have measurements, indicators, and correlating letters to highlight each seam. You can also see more examples below.
- Alterations: If there are any alterations required after the sample is completed, you would indicate it here. For the initial sample, this would be left blank.
- Fabric: What type of fabric(s) will you be using for your garment? Cotton, Rayon, Silk, etc. If it is a blended fabric, what is the composition? For example, 90% cotton and 10% spandex. If we do not know the fabric, we cannot provide a quote. On each individual spec sheet, it allows for 5 different “types of fabric” that you can enter. This may or may not apply to you, it depends on your design – some garments require a number of different fabrics to be used. For example, a bikini may require 80% nylon / 20% spandex for the main body and 90% polyester / 10% spandex for the lining. This information would need to be entered as “type of fabric 1” AND “type of fabric 2”
- Pantone Code: Pantone is the globally recognised company and authority on colour and colour coding systems. You can click on the “Pantone Code” link in that particular cell to take you to the Pantone colour code page then scroll through to select which specific Pantone colour you want to use. Once you’ve selected your Pantone colours, simply copy the 3 or 4 digit code from their website and enter it into the space provided in your spec sheets. Also, ensure your computer monitor is at the brightest setting to see the colours in their truest shade. Keep in mind, depending on the fabric and dying requested, this will changed your MOQ.
- Screenshot of Colour/Print: What colour do you want your fabrics to be? Black, white, purple, blue, etc. Just name the colour in this space. Depending on your preferences and fabric choices, you can choose to work with some of the pre-dyed fabrics available. Add an image of the colour in this space. If you wish to have a specific design printed onto your choice of fabric, then once again you’ll need to add a screen shot of it into the space provided in your spec sheets. We will need you to send us the graphic designed image files before the printing can begin but for right now, an image will suffice and allow us to determine what method of printing will be best for your specific needs.
- Additional: If there are special trims or materials, specific stitching or any other supporting images that will help in your garment production, please feel free to add these into new cells or make additional notes. This could include such things as buttons, zippers, piping, snaps, clasps, etc. If you have an image, that would make things easier for the manufacturers. Have a look at our blog post “Best Type of Stitching” to see if you require any of these for your production. If there are any other details you want to explain, you can add this in.
Its important to note that if changes need to be made to your garments, there may be a cost involved. For example, if you’ve indicated the “front body” must be 60cm tall and after seeing your samples you want it to be 65cm tall, new patterns and new samples will need to be made. Manufacturers can’t just add more fabric to extend the length of the garment like this. This means you will be charged for a second sample to be made. Having said that, if you want to shorten the length, perhaps 55cm, this can be adjusted on the original sample; you can simply send back the original sample to us without having to pay the sample costs again.
Think of it this way – you can cut your hair but you can’t stick it back on afterward. The same applies for your garments.
Once you have completed “Specs Garment 1” for your first garment, you will need to repeat this process for each different style. As you can see, there are 24 spec sheet tabs available. If you need more, simply add more tabs.
The process of how to fill in spec sheets correctly should be clear for you at this stage, with all the basic requirements listed above. We work tirelessly to help our manufacturers produce your garments exactly as you intend to have them. By providing us clear, concise, and detailed information, the process and time it takes to manufacture your garments will be reduced.
How to Fill in Spec Sheets: Measurement Lines and Specifications
While approximately 60% of our customers are experienced fashion designers, retailers and wholesalers, the other 40% are startups and other people who are entering the world of clothing manufacturing for the first time. But whether you’ve been in the business for decades or just starting out, you basically have two options – either design an entire garment yourself, or replicate one that already exists.
So how do you determine the measurements for a garment anyway? The easiest way, and the way nearly all of our customers do it these days, is to use a garment that already exists in the general style you want for your own, as your base template. Its much easier to measure a t-shirt or a bikini or a baby’s jumper that’s already in the closet or can be bought at your favourite shop than to have to sketch it all out from scratch.
Lets review some of the images below. Please click any of the images below to enlarge them for a closer look.
T-SHIRTS
If you’re producing any of the garments from our examples shown below, then we’ve already done some of the work for you by showing you the exact types of seam-to-seam measurements we’ll need. If you’re not sure what to measure, then simply measure everything.
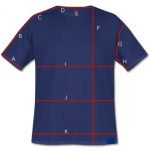
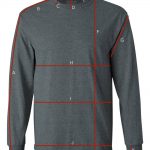
As you can see from the example of the navy short sleeved t-shirt on the left, the correct way to provide your measurements is to draw a line for a specific seam or opening, then indicate which measurement it is with a letter.
Here is how you would provide your measurements:
(A) sleeve opening; (B) sleeve length (top); (C) shoulder length; (D) neck width; (E) neck depth; (F) body length; (G) armpit; (H) sleeve length (bottom); (I) chest width; (J) waist width; (K) hip width.
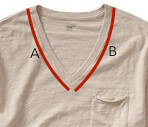
* If you choose to do a v-neck, we will need to know the length of the V (A and B).
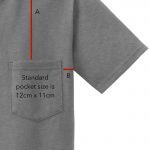
** If you choose to add a pocket, we need to know (A) how far down from the shoulder it is and (B) how far in from the side seem it is.
*** If you are doing a long sleeve t-shirt, we will need to know the (C) neck trim and (K) cuff trim.
PLEASE NOTE: For certain standard items such as short and long sleeved t-shirts, we can use our manufacturers’ standard sizing and measurements but chances are they wont match exactly what you want and we may require these measurement details from you.
SINGLETS & TANK TOPS
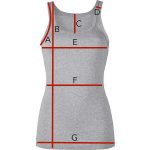
If you are producing singlets or tank tops, please ensure to include (A) Shoulder opening; (D) shoulder strap width. This example is for a woman’s tank top but the same measurements will apply for men’s too.
HOODIES & JUMPERS
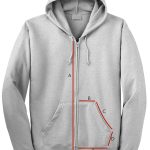
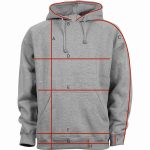
Every week we receive around 10 enquiries for hoodies or jumpers, and nearly everyone asks for production costs without providing any details – but these tops are actually more complex than they seem. When outlining measurements for these tops, the same measurements apply as on the long sleeved t-shirts. In addition, we will need to know (B) hood circumference. If your design has a single pocket or if your design is a zip-up hoodie, we will need to know (A) length of zipper; (B) pocket width (top); (C) pocket opening length; (D) pocket depth; (E) pocket width (bottom).
BASIC DRESSES
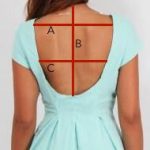
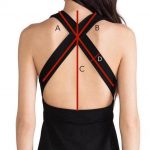
When measuring for a basic dress, you will need to consider the measurements for (A) sleeve length; (B) full front length; (C) neck depth; (D) neck width; (E) sleeve opening; (F) chest width; (G) waist width; (H) hip width; (I) bottom width. Additionally, if there are special details in the back of the dress, we will need to know the measurements for these as well. Depending on the style, a variety of measurements may be required as shown below.
SHORTS & TROUSERS
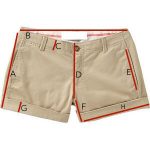
If you are producing shorts or trousers, you will need to include details and measurements of (C) band height; (D) crotch height; (E) pocket opening – if this applies; (F) inseam; (G) cuff height – if this applies; (H) leg opening. Please also include any details that they may be on the back of the shorts or pants such as pockets or buttons and the distance these elements are from any specific edge or seam.
BOARD SHORTS & BIKINI’S
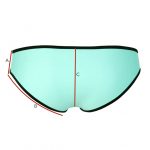
Finally, the most common garments that Clothing Manufacturing Agent Bali are asked to help produce are board shorts and bikinis. We have a number of manufacturers that specialise in manufacturing these garments but there are a wide variety of variables to consider. Using a pair of board shorts and bikini’s you already have and love is the best way to get your measurements exactly as you want them. The measurements for board shorts are similar to regular shorts and you would need to highlight (A) shorts length; (B) waist; (C) crotch; (D) band height; (E) inseam; (F) leg opening. If there are any pockets on the front or the back, please add these too. For bikinis, we would need you to provide all of the measurements shown in the example images below.
How to Fill in Spec Sheets: The Master Spec Sheet
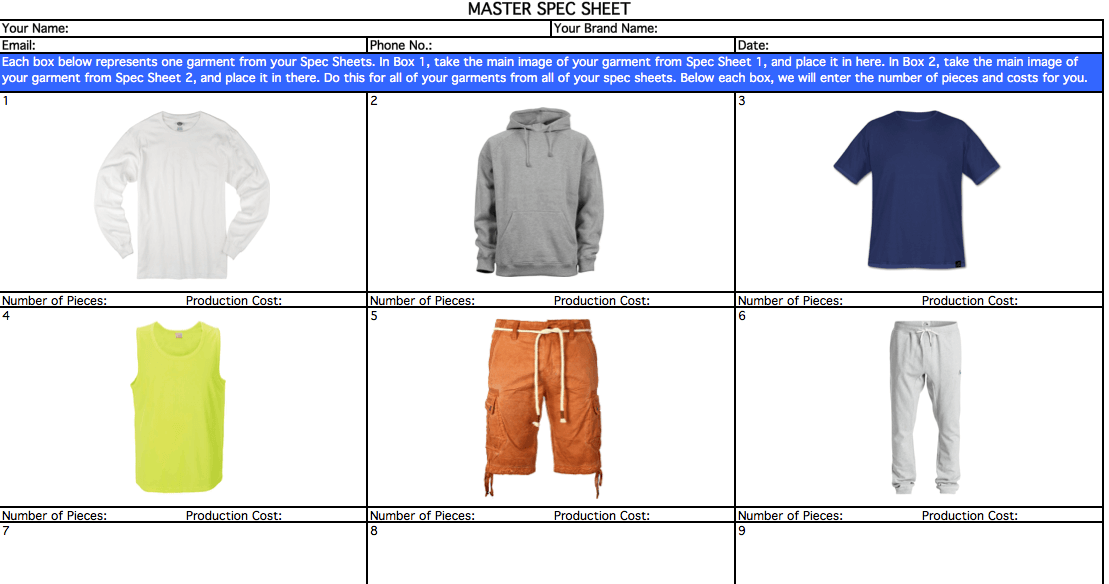
In addition to filling out the spec sheets for each of your garments, we ask that you fill in the Master Spec Sheet as well. More like a gallery of single images that represent one garment each, this section provides a quick overview for the manufacturers and suppliers to see what it is you are producing. Additionally, this is where they will add approximate production costs quotes under each garment.
In this Master sheet, you would only need to embed one image for each garment, as per our example below.
- Once again we ask that you fill in Client Name, Brand Name, Email, Phone Number and Date.
- Number of Pieces: This is the total number of pieces you would like to produce. Although you are welcome to enter a specific number of your own choice, ultimately the final Minimum Order Quantity may be determined by factors such as your fabric choice, printing or dyeing techniques to be used, or materials needed.
- Production Cost: In this space the manufacturer will add in the production costs of that specific garment. There may be additional factors and costs associated with your production that will not be indicated of added here such as the cost of screens, that is, if this was required. We will let you know of any and all additional costs.
In Summary
Our manufacturers and suppliers don’t like to guess; they want to produce the perfect quality garments for you in the quickest possible time. It will save you time and money to provide as much detailed information regarding the construction of your garments from the onset. Having to send samples back and forth not only wastes time but costs you valuable opportunities when you could be selling your clothes to your marketplace instead.
When you consider how to fill in spec sheets, not all boxes may apply to your specific needs. If you’re ever unsure about how to provide your measurements, the easiest thing to do is to measure everything from seam to seam. We’re also here to assist you if you run into any hurdles.
After reading all of this information, you will be equipped with the right tools to help you provide the best detailed spec sheets to our manufacturers, moving you toward your clothing manufacturing goals.
If you would like to obtain estimated production costs for your garments, once you have completely filled everything in your spec sheets, please send it back to us by visiting our Request a Quote page or simply email it to us so that we can review it and get you your quotes fast!

